How Can We Help?
The Word to HTML Visual Editor is able to customize CSS styles for specific HTML tags and allows you to add your own CSS classes that can be used to format your content.
You can add/paste custom CSS from your website if you want to style the content the same way as on your website.
In order to add your custom CSS you have to go to the Preferences page:
h1 { color: blue }
p { padding: 20px 0 }
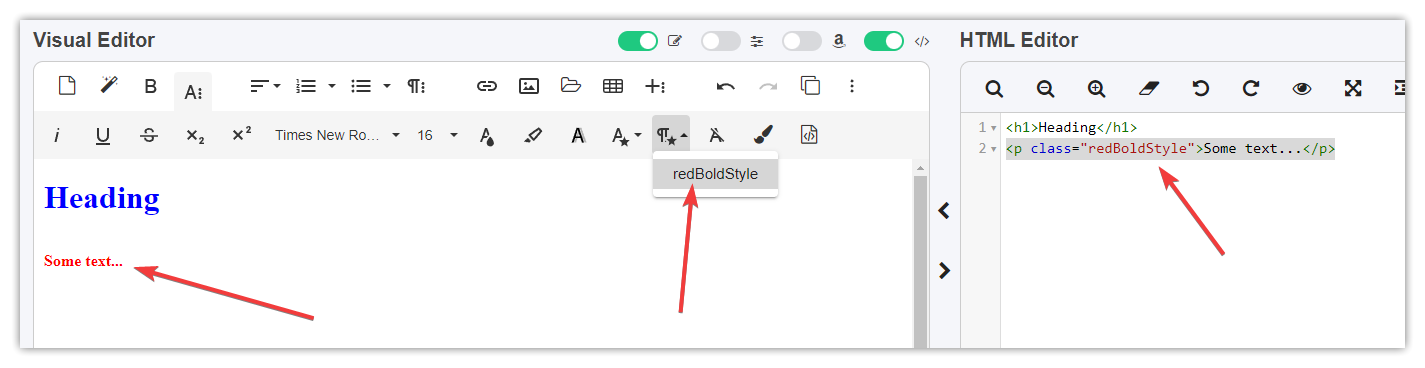
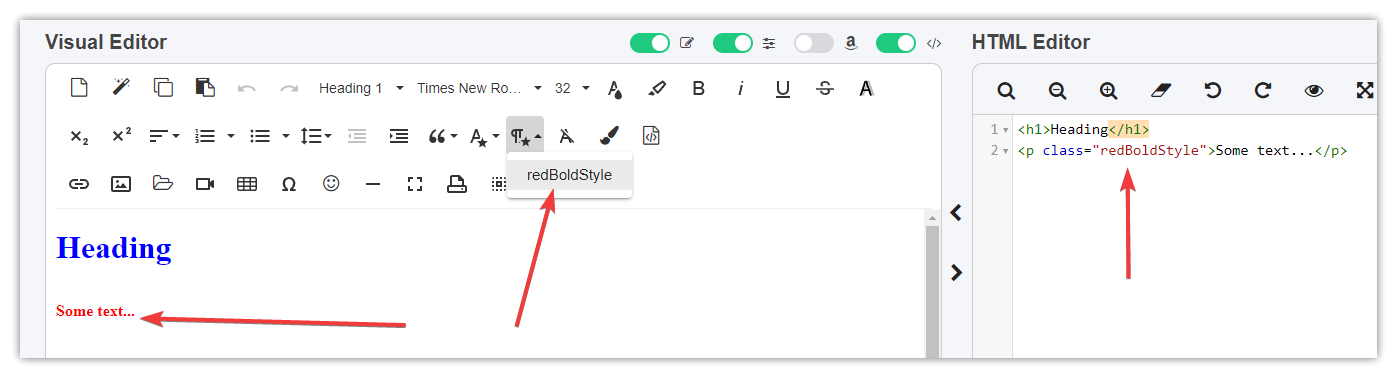
.redBoldStyle { color: red; font-weight: bold }

This is how you can have custom styles for tags in your Visual Editor content. In the example above you can set a blue color to all <h1> tags, custom padding for all <p> tags, and add a custom class style called ‘redBoldStyle’ that styles are then available for your use under the Paragraphs Style drop-down icon in the default editor or Formats menu in the TinyMCE editor.
To apply the style the default Visual Editor please select your text and click the Paragraph Style icon (compact toolbar mode), and then click the style you want to apply.
When using full toolbar mode please select your text and click this icon to see your custom CSS classes:
To apply the style in TinyMCE Editor please select your content and click the Formats menu, and then click the style you want to apply.
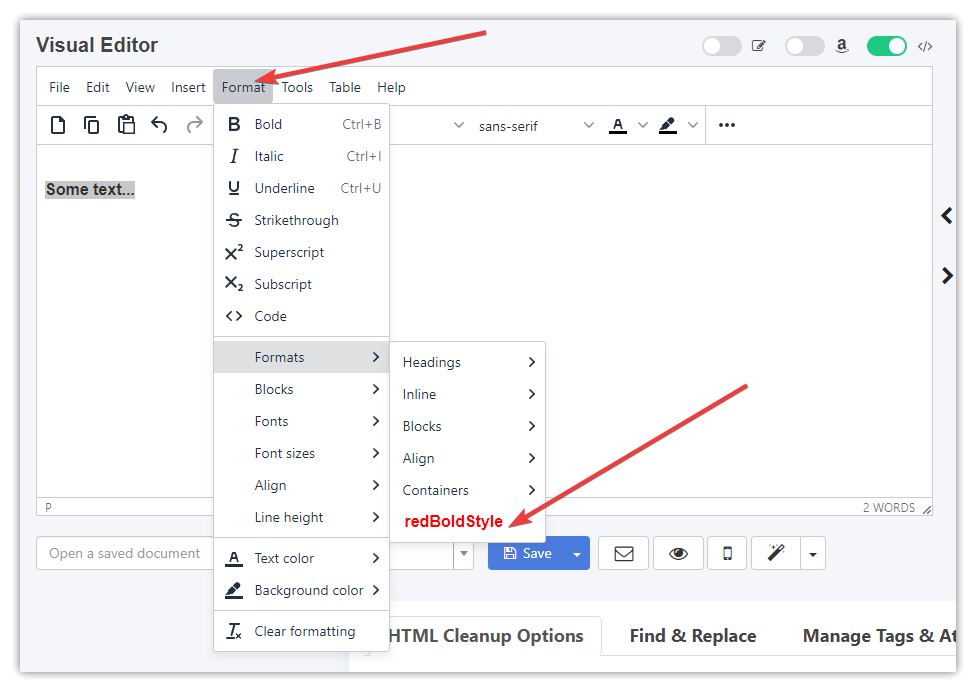
Visual Editor will add the class to your selected content:
